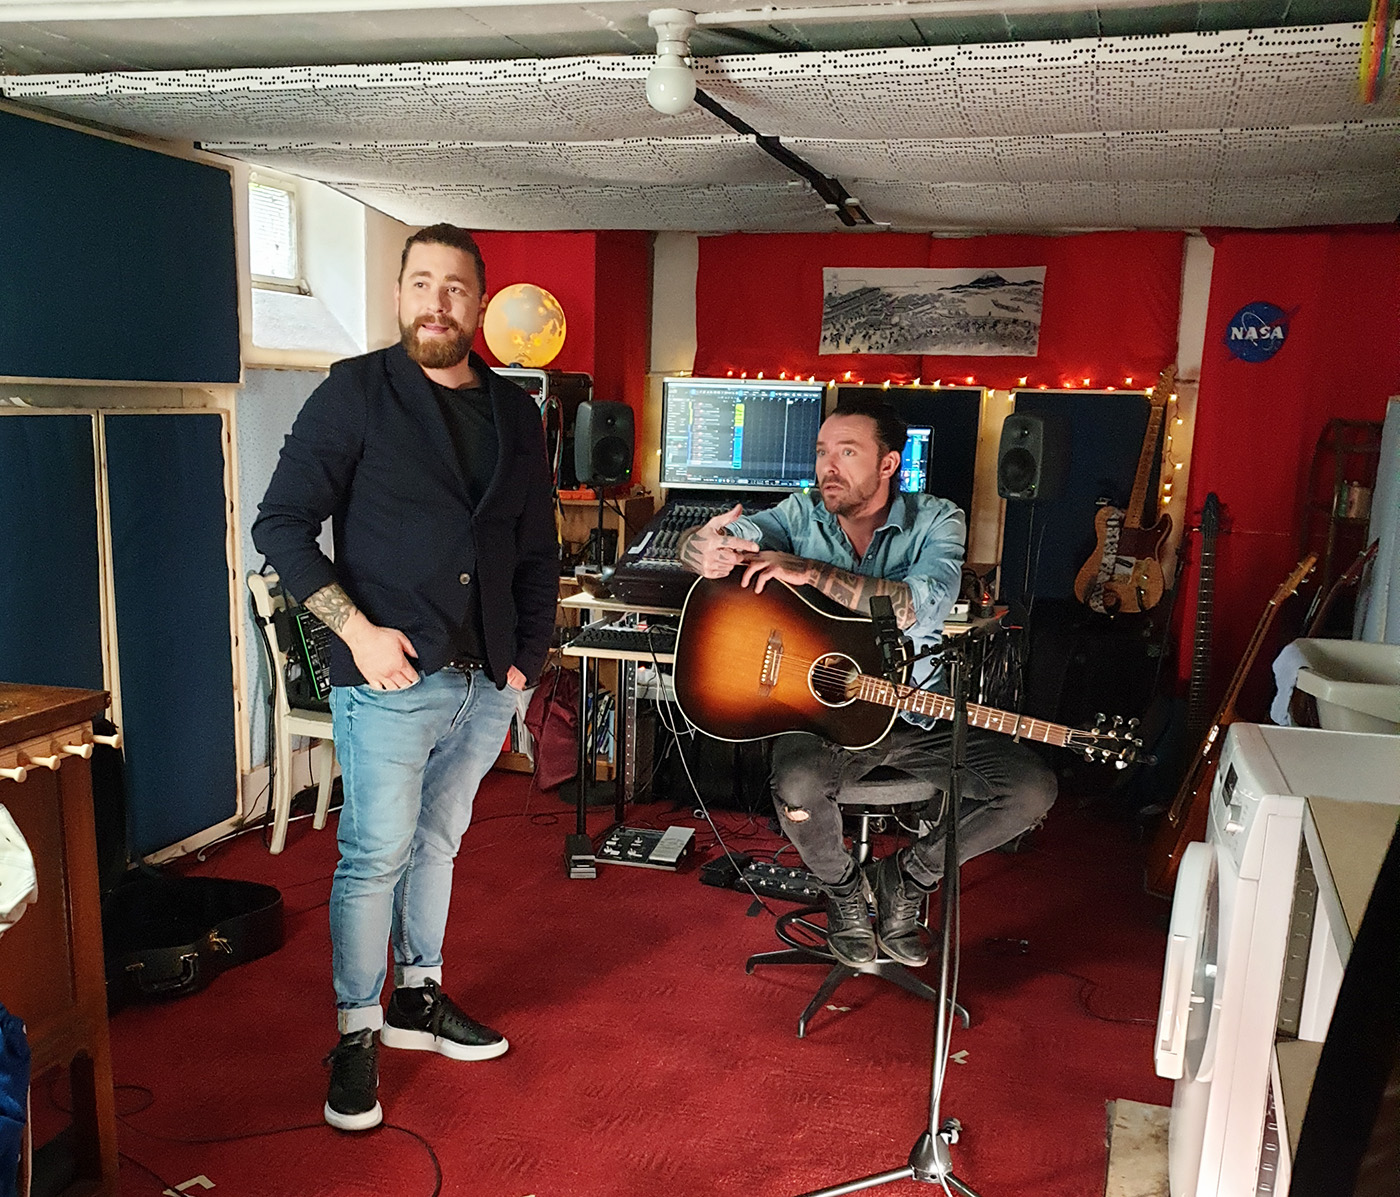
Senler Media was tasked by Smile Direct Insurance Company with producing their promotional video for this year’s Swiss Digital Day. The highlight of the video was the live acoustic session by Swiss Singer/Songwriter Baschi performing his song “Wenn d’Wält” together with his touring guitarist, Phil Merk.
Skip to 15:00 to listen to the song:
We recorded the session at my basement studio. Everybody was well rehearsed and prepared: We recorded everything in three takes.
Time pressure was high. I delivered the final mix within 24 hours of recording. There would have been time for reviews or changes after that, but none were requested, the client was happy apparently.
Mics / Inputs
- Baschi Vocals: Neumann KMS 105
Baschi’s voice has a great, raspy quality, and the Neumann captured it really well. It was a good decision to use a condenser mic for this intimate session, as I was able to give the voice much more “air” than I would have been possible with a dynamic mic.
I was also very impressed by pop-filter that is built into this microphone. Baschi sang into the microphone with a rock singer’s attitude and there was no oversaturation whatsoever, and very few harsh plosives on the recording. In those few cases I just used some gentle automation. That being said, it is a live performance, not a studio recording where every phrase and syllable gets tweaked and edited. - Guitar: AKG C414 B/ULS
Set to supercardioid for better isolation and aimed at the 12th fret about 30cm away. Worked like a charm. - DIs & Compressor
I did capture a DI signal of the guitar and I also sent Baschi’s vocal in parallel through a dbx160 compressor. I didnt use either of those signals, as I found they didn’t add anything to the mix, so I left them out. - Preamps & Desk
Both mics went straight into my Midas Venice F 32. Because those are the best pre’s I own. Had I had the option to use “better” pre’s, I’m sure I would have tried them out. I had to turn up the gain quite a bit, but there’s usually no audible noise or crosstalk on this desk. - DAW
Everything went straight into Presonus Studio One
Mix
My approach in general is to first reduce or eliminate everything that’s “in the way”, and then enhance whatever is remaining and shape it into a well balanced product. I am pretty good at the first bit, the second part, aka the art of mixing, I know will be a neverending journey.
I used stock plugins only for the mix of this session. No melodyne or ptch correction.
The vocal and guitar performances paired up nicely. The song is well arranged. There wasn’t too much overlap in the frequencies, and if there was, it was always clear that the vocal would need to stand out, making all those usually tough mix-decisions a whole lot easier.
Vocal Chain
- Multiband Compressor
To tame down the lowest of lows in the vocals, as they were distorting my Macbook speakers. I like to switch to my built in speakers from time to time to check my mix. If it’s distorting, I know I have to fix something. - De-Esser (Multiband dynamics).
No surprise here with a sensitive condenser mic like the KMS 105, I had to de-ess the vocals a lot, as the sibilance was very harsh. - EQ (reduce resonance)
This first EQ was just to remove some resonance at 200, 400, 800 and ca. 1.6k Hz. A linear phase EQ would have been good for this case. - EQ
For the the second EQ I employed a generous low cut up to 130HZ, then added some slight boost with a gentle Q (ca. 4db) around 303 and 6.6k. I experimented with different cuts, but found that it took away too much body from the vocal each time. - Compressor (short attack)
To bring down all the peaks, and even out the signal I employed a fast compressor with a 10:1 ratio - Compressor (long attack & release)
To give the vocal more thickness I used a slower attack and release setting, with a more gentle ratio (4.7:1). Threshholds for both comps are at about the same level. - Gain
After all this processing and compression, I added 9.7dB of gain to compensate for all the volume loss. This way I was able to keep the vocal fader around 0db and just use slight automation where needed to catch the very harshest peaks, or boost some of the quietest parts.
Guitar Chain
- EQ
Some slight boost around 990 and 6.6k. Gentle cut around 570 Hz. - EQ
Catch some resonances again (95 & 160 Hz), plus a generous 6db gain at 230Hz - Multiband Compressor
I was noticing my MacBook speakers were distorting from the low frequencies in the guitar. EQ-ing them away just made everything sound thin, so I opted for a multiband compressor. Everything up to 300Hz is heavily compressed when it reaches the threshhold. That brought everything down nicely.
A dynamic EQ would have been more suited, but Studio One doesn’t offer a stock dynamic EQ in its arsenal. - Fast Compressor
Same as with vocals. To catch all those pesky peaks - Another fast compressor (?) with an even lower threshhold.
Don’t remember why, but apparently that was needed. Sometimes it helps to compress twice on gentler settings instead of going in once with very aggressive settings. - Multiband Compressor
Reduce the lows again, and add some air. I found that this Multiband Compressor really gave the guitar its final character for the mix. I was able to shift the focus of the frequencies. - Sidechain Compressor (fast)
To duck the guitar when the singer sings - Sidechain Compressor (slow)
More ducking with a longer release. To give it a more rounded, balanced feel.
I feel that the sidechaining really helped the overall vibe of the track, and it’s not really audible, but it makes it so much tighter.
Reverb
Alesis Quadraverb to the rescue!
No matter what I tried, I found that the plugins were giving me to much of a washed “ssss”-y sound using the directly recorded tracks.
I decided to send the vocal and guitar tracks individually onto a bus on my mixer (including the delays) and EQ-ed that bus to hell and back. Basically making it very very dull-sounding on the input. Then I set up a plate reverb on my oldschool Alesis Quadraverb with a long decay aaaaand voilà. That trick worked really well. The reverb sounds lush and full, without the ssssssibilance or spiky-ness from the guitar strings washing over the whole ambiance.
These Quadraverb delay tracks were processed with a mid side matrix, essentially reducing the mid part of the signal. In the final mix the instruments fill up the middle, while the reverb just shimmers along nicely on the sides. I’m very pleased with that solution. I hope I remember it for future sessions.
The Quadraverb tracks were then sent into some more reverbs (one short, one long) in the DAW which I compressed, just to add a little more tail and decay wherever I needed it, since the Alesis tracks was really very mid-rangey and dull.
Delay
Standard analog delay Plugins. One Short (Slapback) for the vox, and one long. Blended to taste. Nothing fancy here.
Mastering
I had to do the mastering myself. This step to me was mainly to bring the final wav file up to a respectable volume.
I did add some further mid side processing, this time bringing up the sides (=reverb) even more.
There’s also another Multiband Compressor again working at the lows and also keeping the highs in check. It also helped with bringing out some of the more hidden midrange qualities in the guitar. It’s subtle, but it helps.
Finally there’s a limiter boosting the whole mix up by a whopping 11.7db. When I checked, there’s not a lot of peak limiting going on. Just some peaks here and there. I don’t think heavy limiting is necessary for an acoustic session like this (and I’m not a fan of Studio One’s stock limiter).
So there you go. A quick rundown of the mix. Listen to the whole song here (at the end of the video), and read all about the reasons why Smile Direct partnered up with Baschi and Viva Con Agua in this blog post here.


